Edit Tools
The Edit tools allow you to modify and change entities in SketchUp. You can access the Edit tools from the Large toolset, or from the Edit toolbar. You can do this in two ways.
- Right-click on any toolbar, then choose "Edit" (PC only)
- Click on the Window dropdown > Toolbars (Tool Palettes on Mac) and check on the Edit toolbar
Although most Edit tools have some sort of auto-select functionality, you can achieve more precision and control by pre-selecting entities using the Select tool.
DIG DEEPER... Read more about the Edit Tools on page 80 of "The SketchUp Workflow for Architecture".
HEADS UP! Just about every tool in SketchUp has a "hotspot". Typically the tip of a pencil or red arrow within the icon.
Move Tool

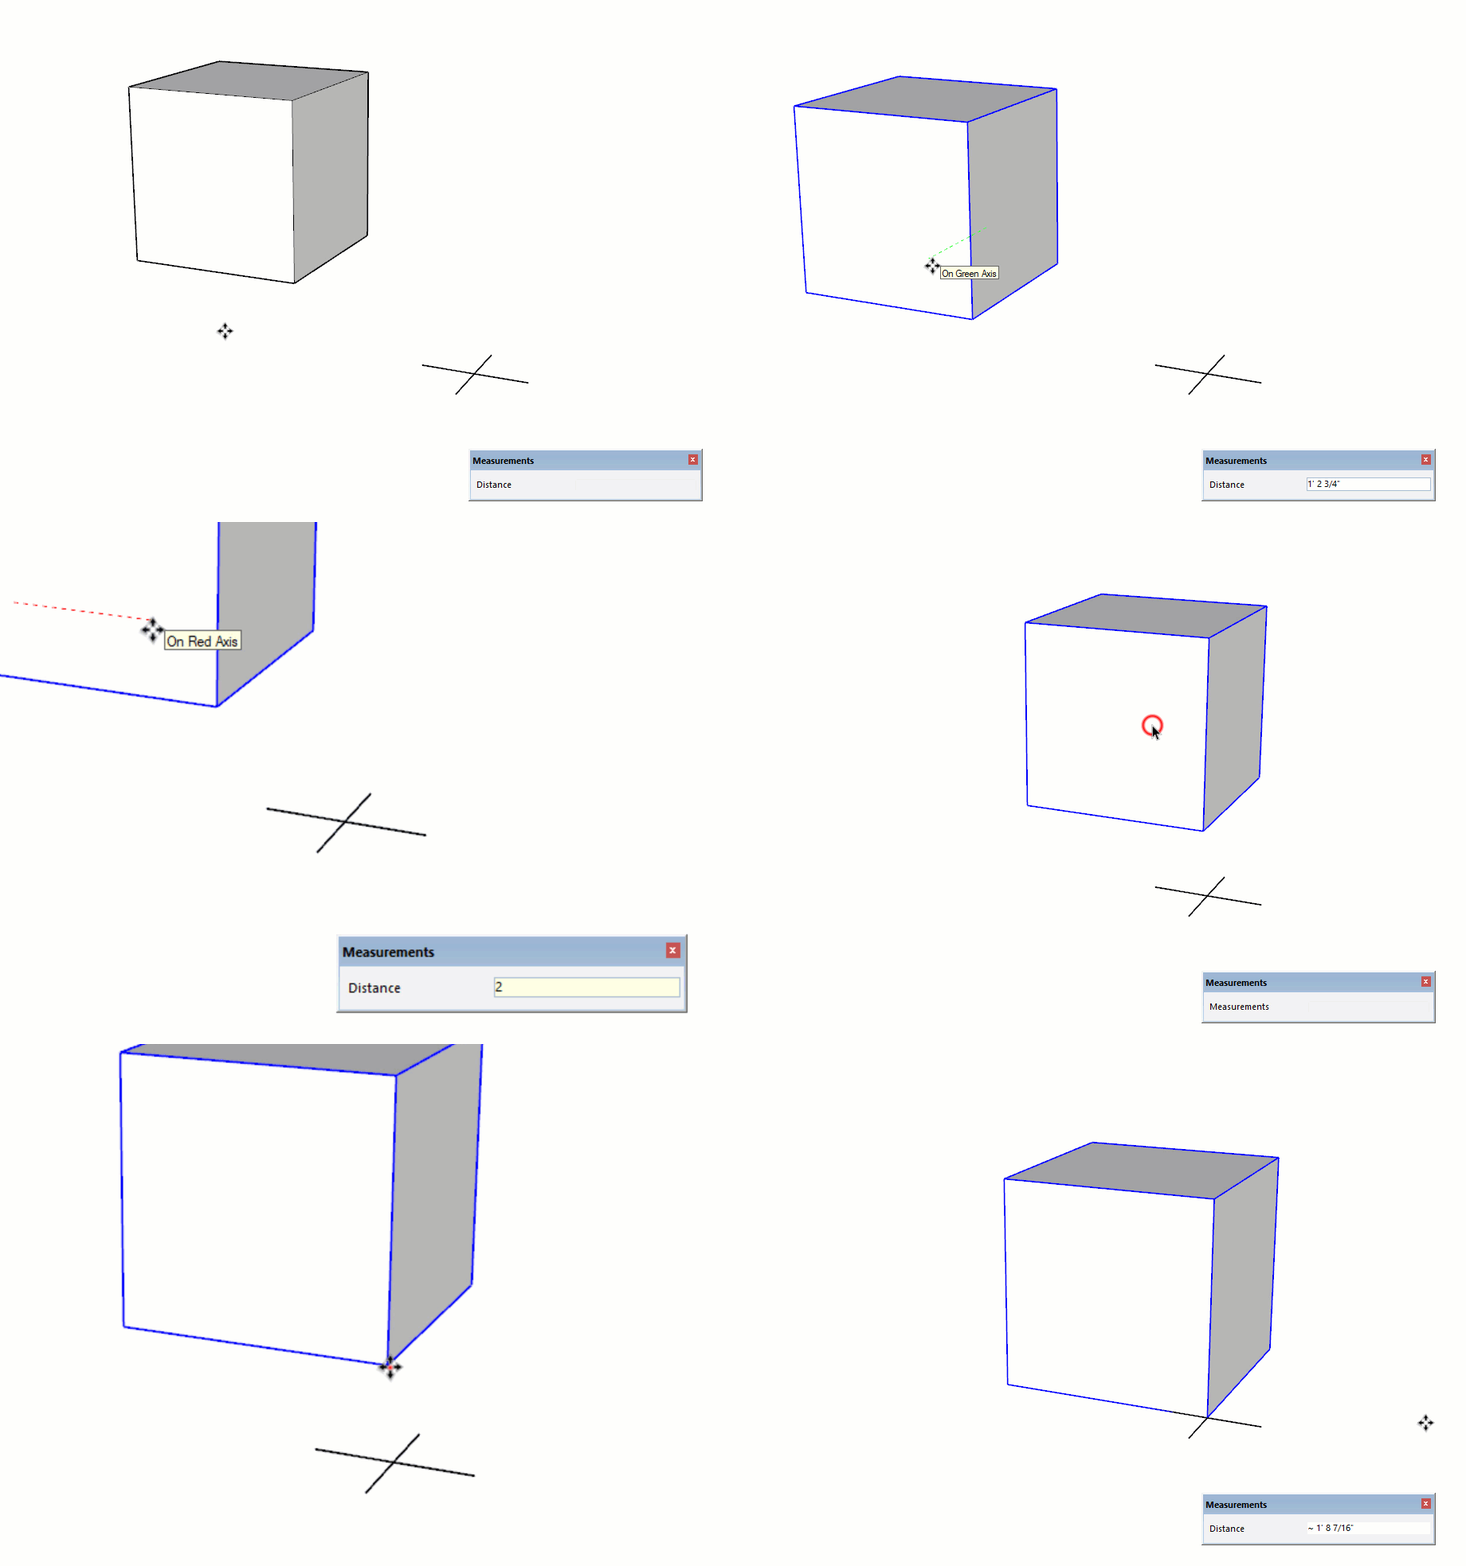
The Move tool allows you to reposition points, edges, surfaces, and objects. Here's a few tips to keep in mind...
- Hover on an entity to auto-select, or pre-select to be more precise.
- Click once to "pick up" an entity, don't click and drag!
- Once a move command is active, the Measurements Box is waiting for a Distance input.
- Click again to finish the move.
- A precise move happens when you start the move with a known point, then finish the move on an intentional point. This often requires a pre-select.
- The Move tool is most commonly used on objects rather than edges and surfaces.
HEADS UP! The Move tool can really mess up a model in a hurry! Make careful selections and be aware of what is beyond your selection before moving.
Push Pull Tool

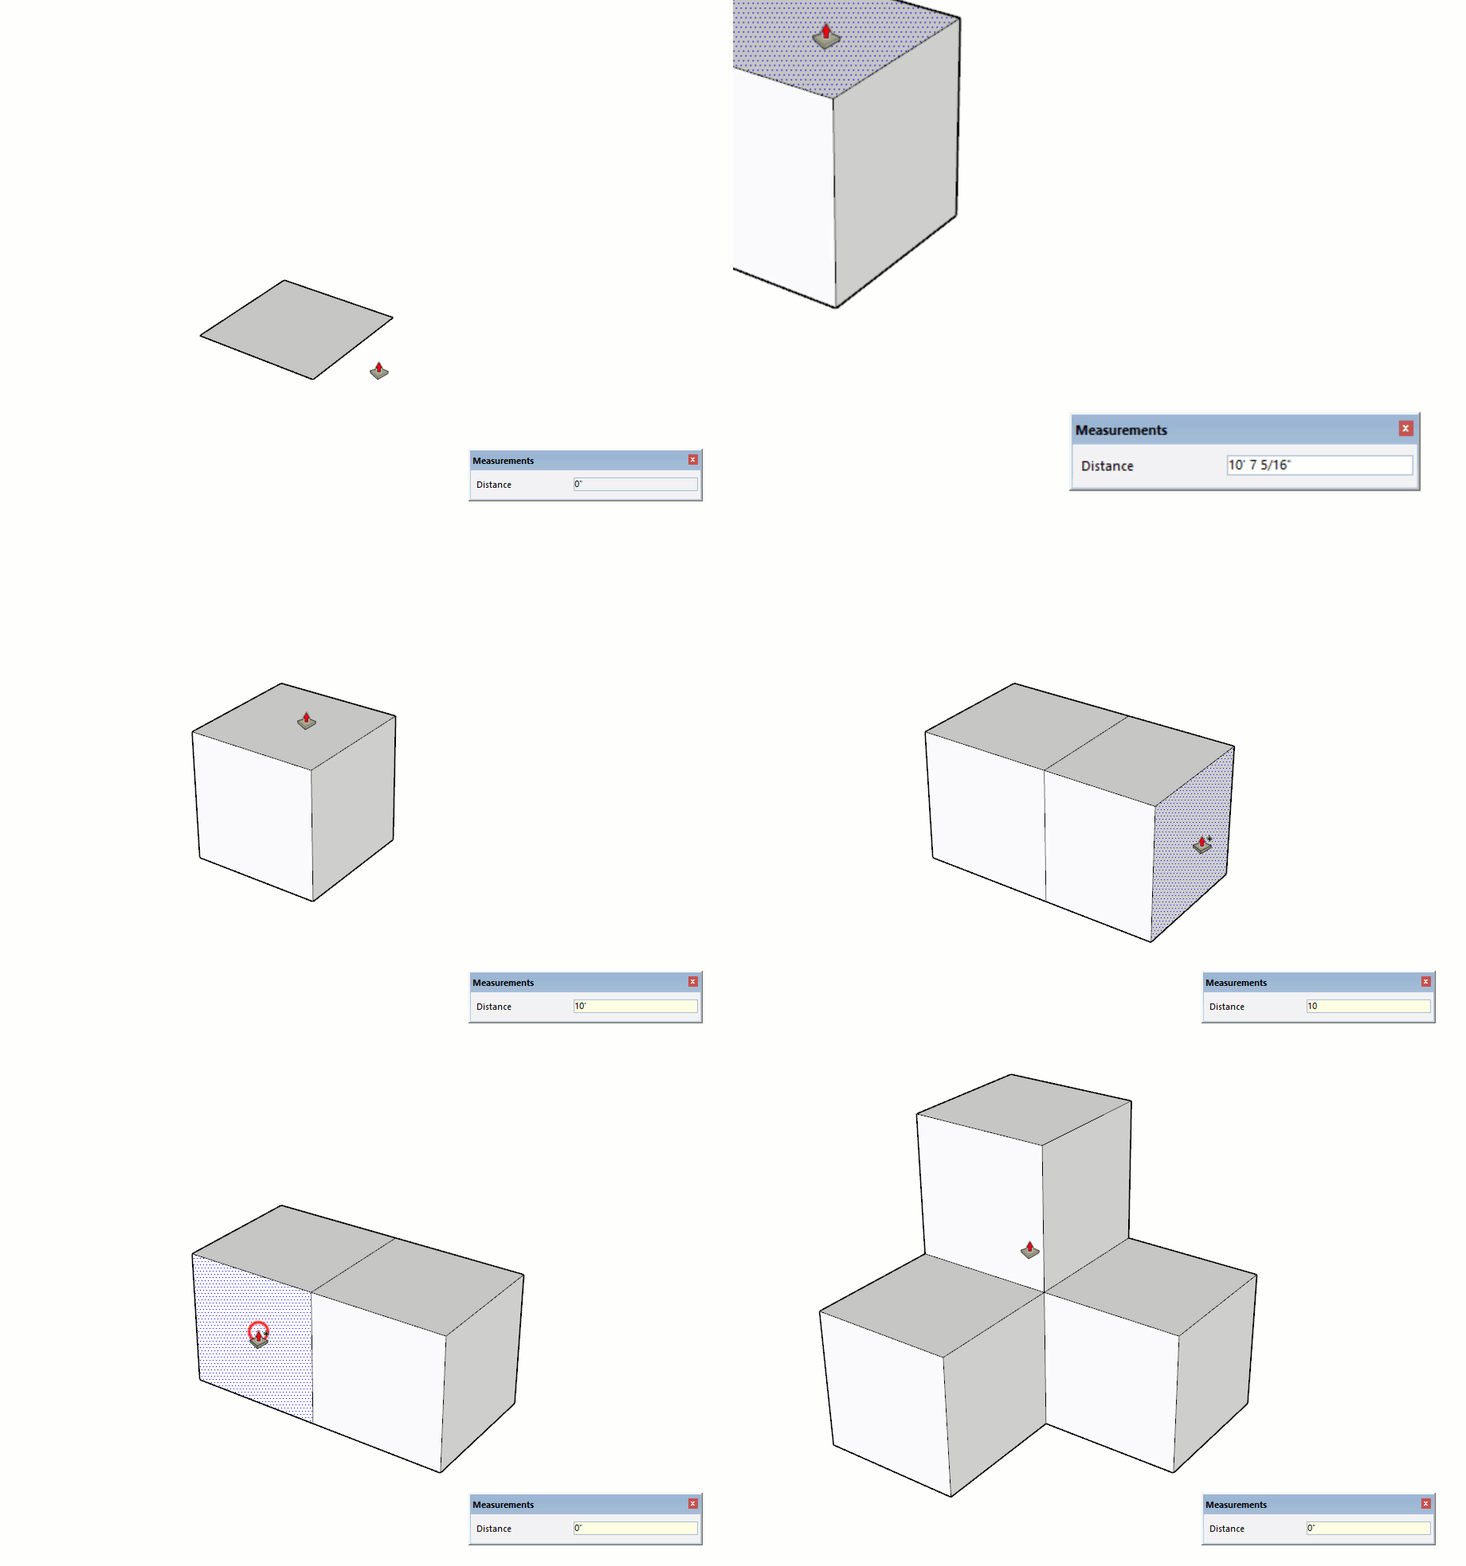
The Push Pull tool extrudes surfaces perpendicular to the starting face. The most effective use of the Push Pull tool is to extrude walls horizontally. Here's a few tips to keep in mind...
- Hover on an entity to auto-select, or pre-select to be more precise.
- Click once to start, move your cursor to extrude, click to finish.
- Once a Push Pull command is active, the Measurements Box is waiting for a Distance input.
- Double click on a surface to repeat the last Push Pull distance.
- Tap the Ctrl key (Option on Mac) to leave a copy of the starting face behind. This is especially useful for turning corners and marking openings while extruding walls horizontally.
Follow Me Tool

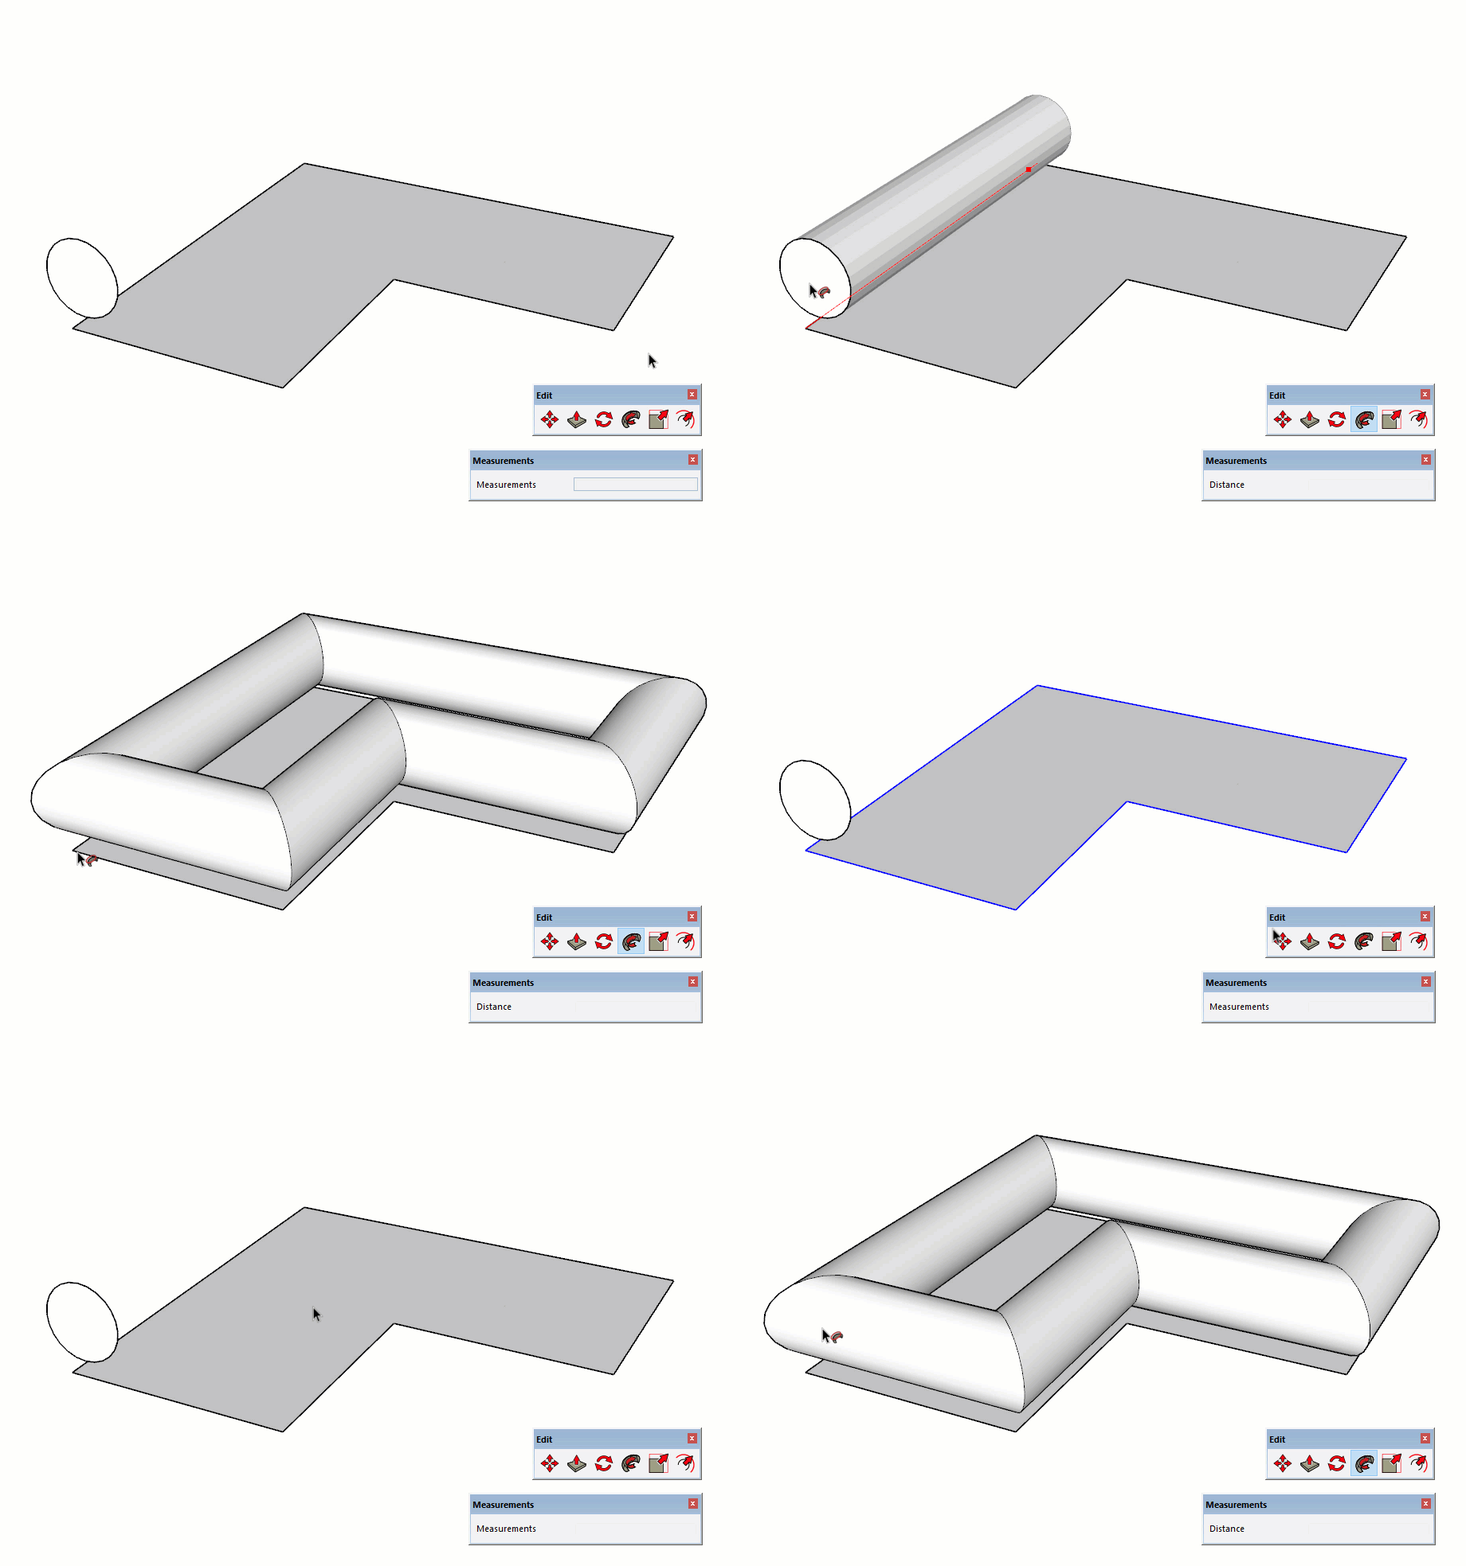
The Follow Me tool extrudes a surface, often referred to as a profile, along a complex path. Here's a few tips to keep in mind...
Rotate Tool

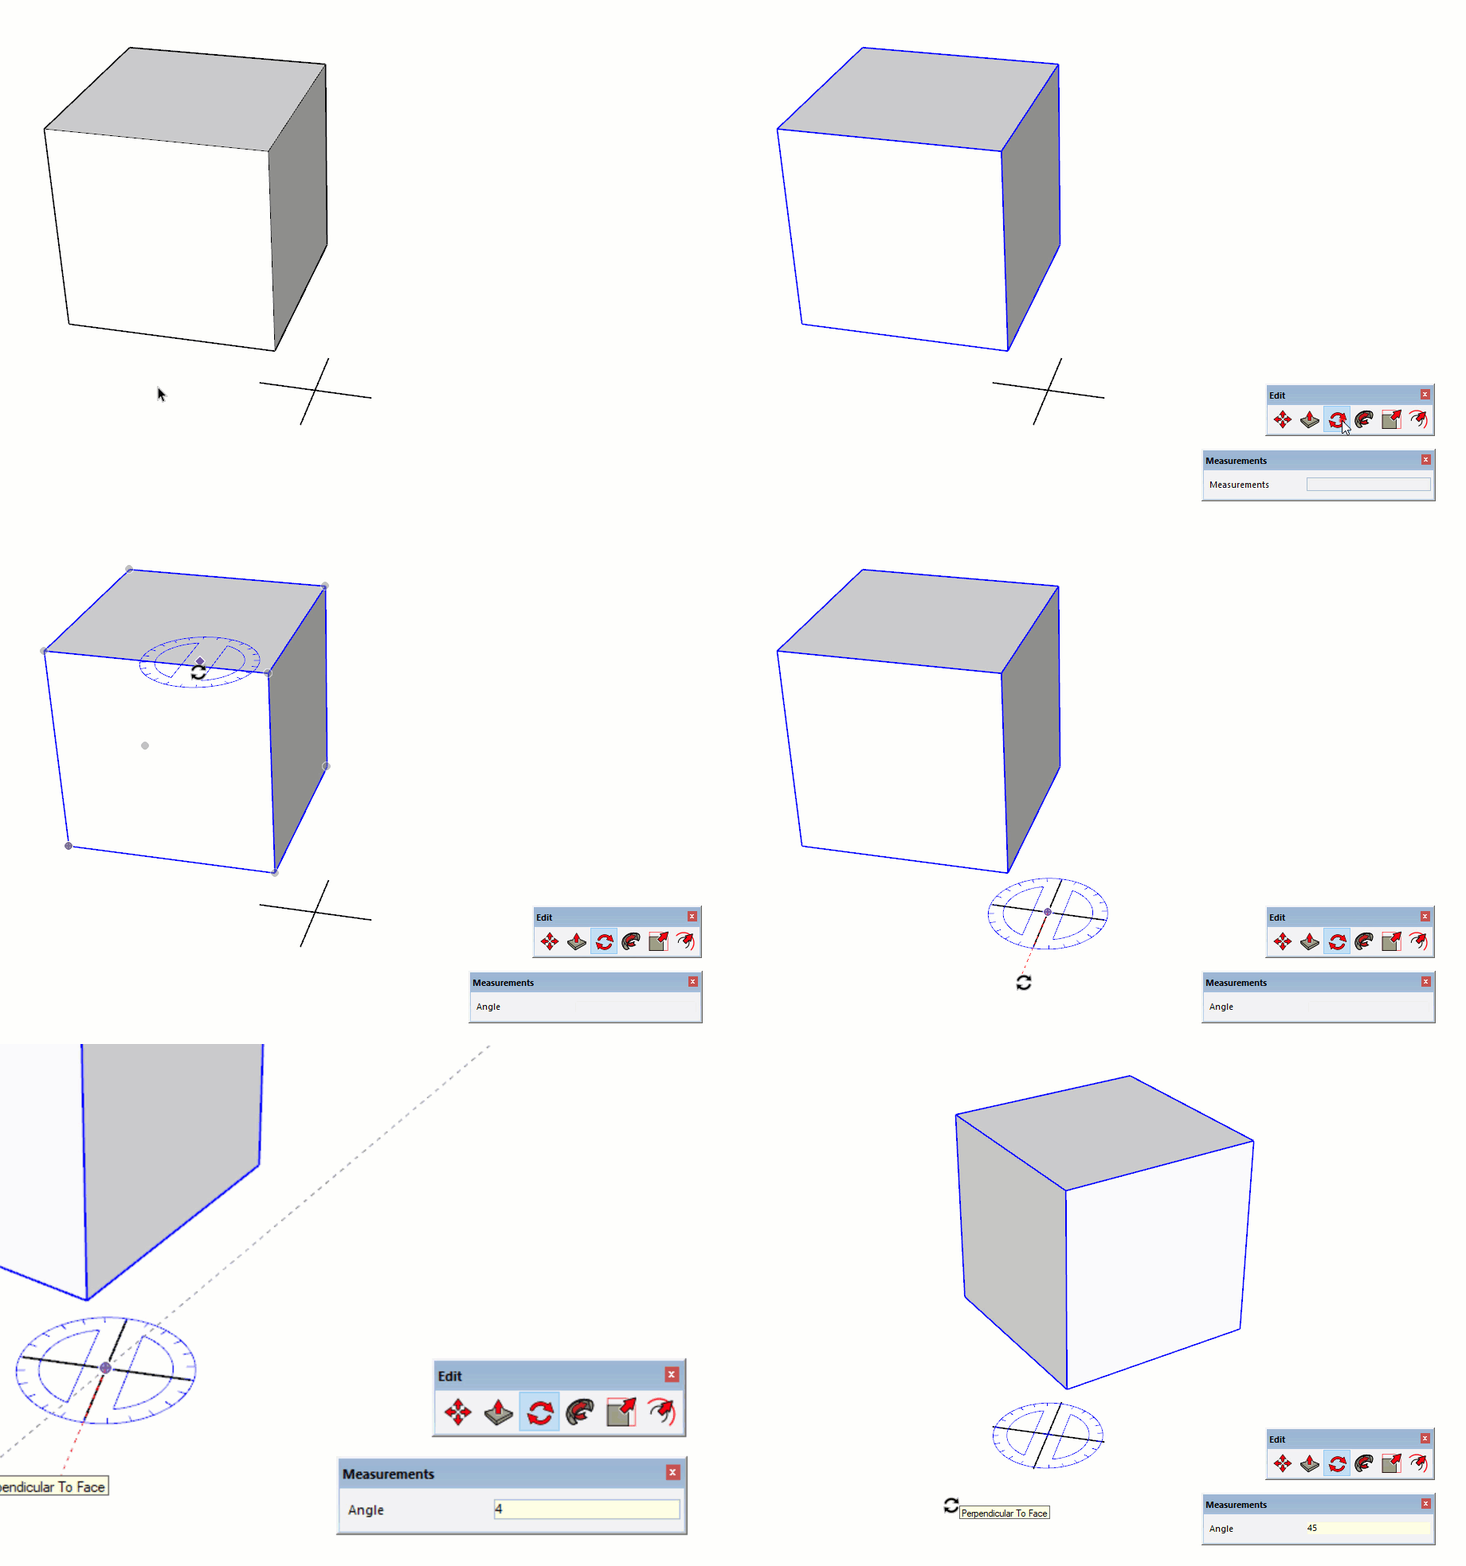
The Rotate tool spins selected entities about a specific center point. Here's a few tips to keep in mind...
- The Rotate tool is best utilized by pre-selecting an entity first with the Select tool, rather than using the auto-select feature
- Hover on surfaces to align the rotation, or tap the arrow keys to lock the rotation to an axis
- Click once to set the center point of rotation, click again to set the reference angle, move your cursor to rotate the selection, click again to finish the rotation.
- Once the reference angle is set, the Measurements Box is waiting for an Angle input.
- A precise rotation happens when you set the center point of rotation at a specific point, and align the protractor
Offset Tool

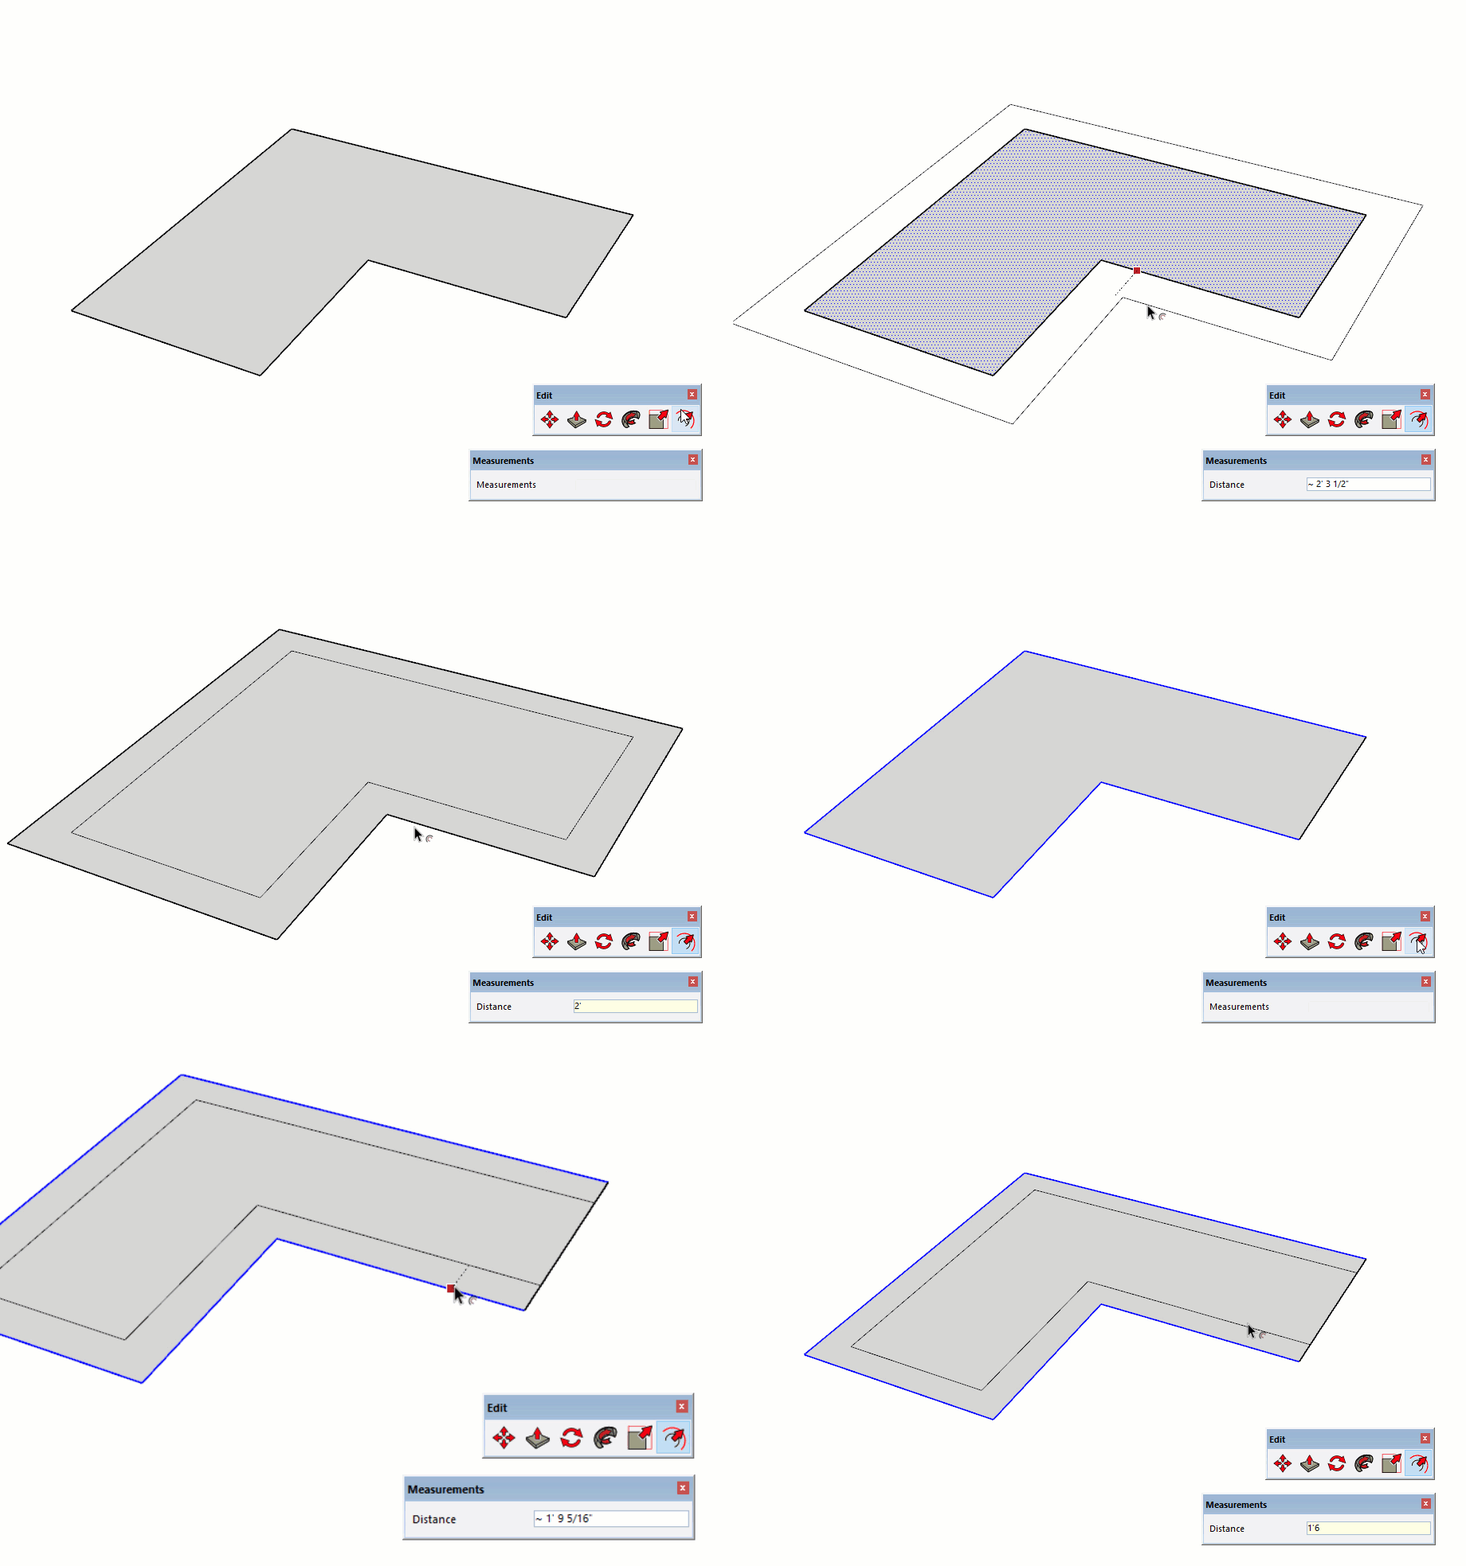
The Offset tool concentrically copies a surface or series of connected coplanar edges. Here's a few tips to keep in mind...
- The Offset tool is best utilized by pre-selecting an entity first with the Select tool, rather than using the auto-select feature.
- The Offset tool auto-select feature does not work with edges, only surfaces.
You must pre-select more than one edge to start an offset. - Click once to start, move your cursor to suggest the offset direction, then click again to finish.
- Once an offset command is active, the Measurements Box is waiting for a Distance input.
- Double-click on another surface or selection to repeat the last offset distance.
Scale Tool

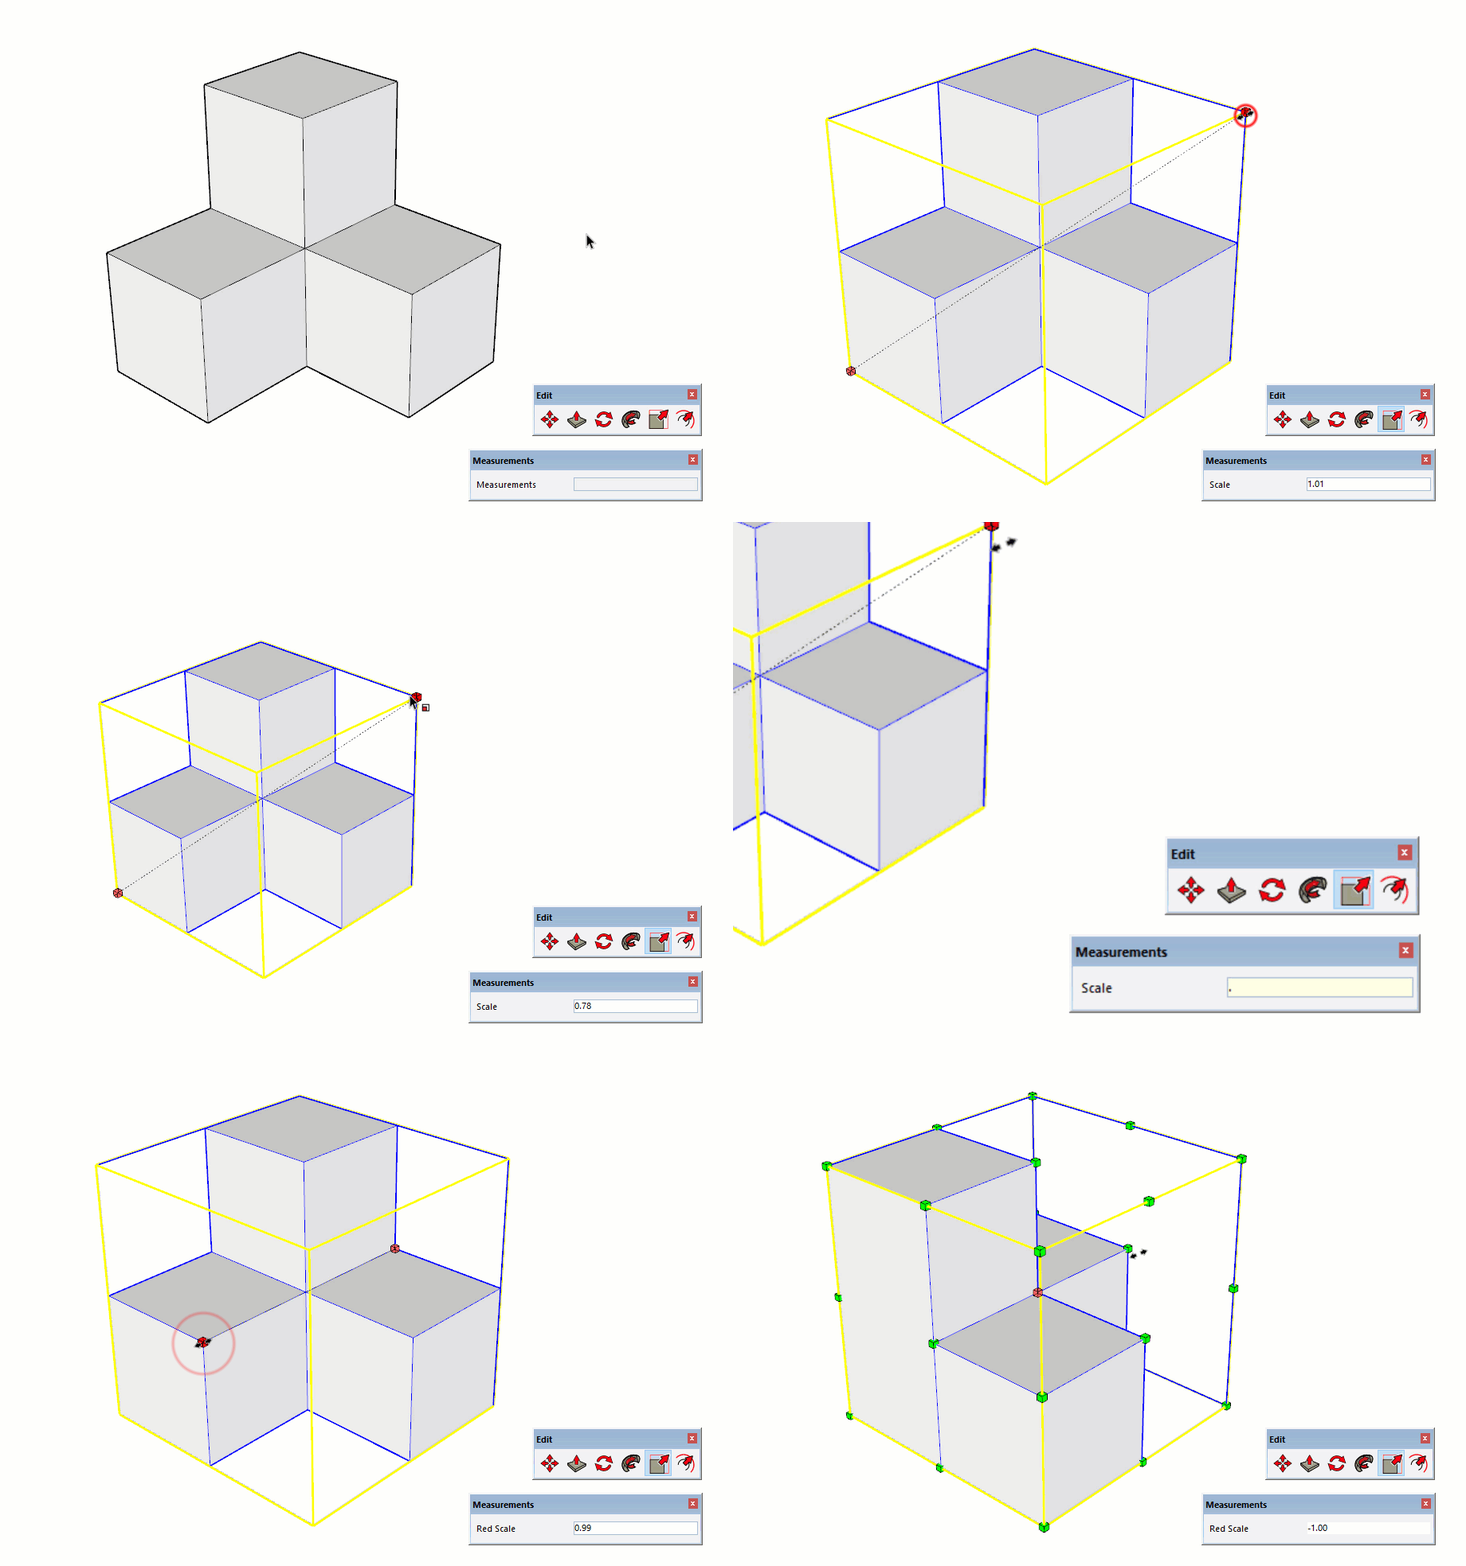
The Scale tool distorts and resizes entities based on a multiplier or a hard dimension. Here's a few tips to keep in mind...
- The Scale tool is best utilized by pre-selecting an entity first with the Select tool.
- Activate the Scale tool and you will now see green grips surrounding the selection. Click on any grip to start the scale command, move your cursor, then click again to finish.
- Once a scale command is active, the Measurements Box is waiting for a Scale input.
You can type a hard dimension, like "5'6, Enter", to set the overall dimension to a specific length. - Hold Shift to uniformly scale the selection without distortion.
- Hold Ctrl (Option on Mac) to scale about the center of the selection.
- The Scale tool can be used to mirror entities by scaling from a center grip to -1. It almost feels like you are turning the shape inside out.
Paint Bucket

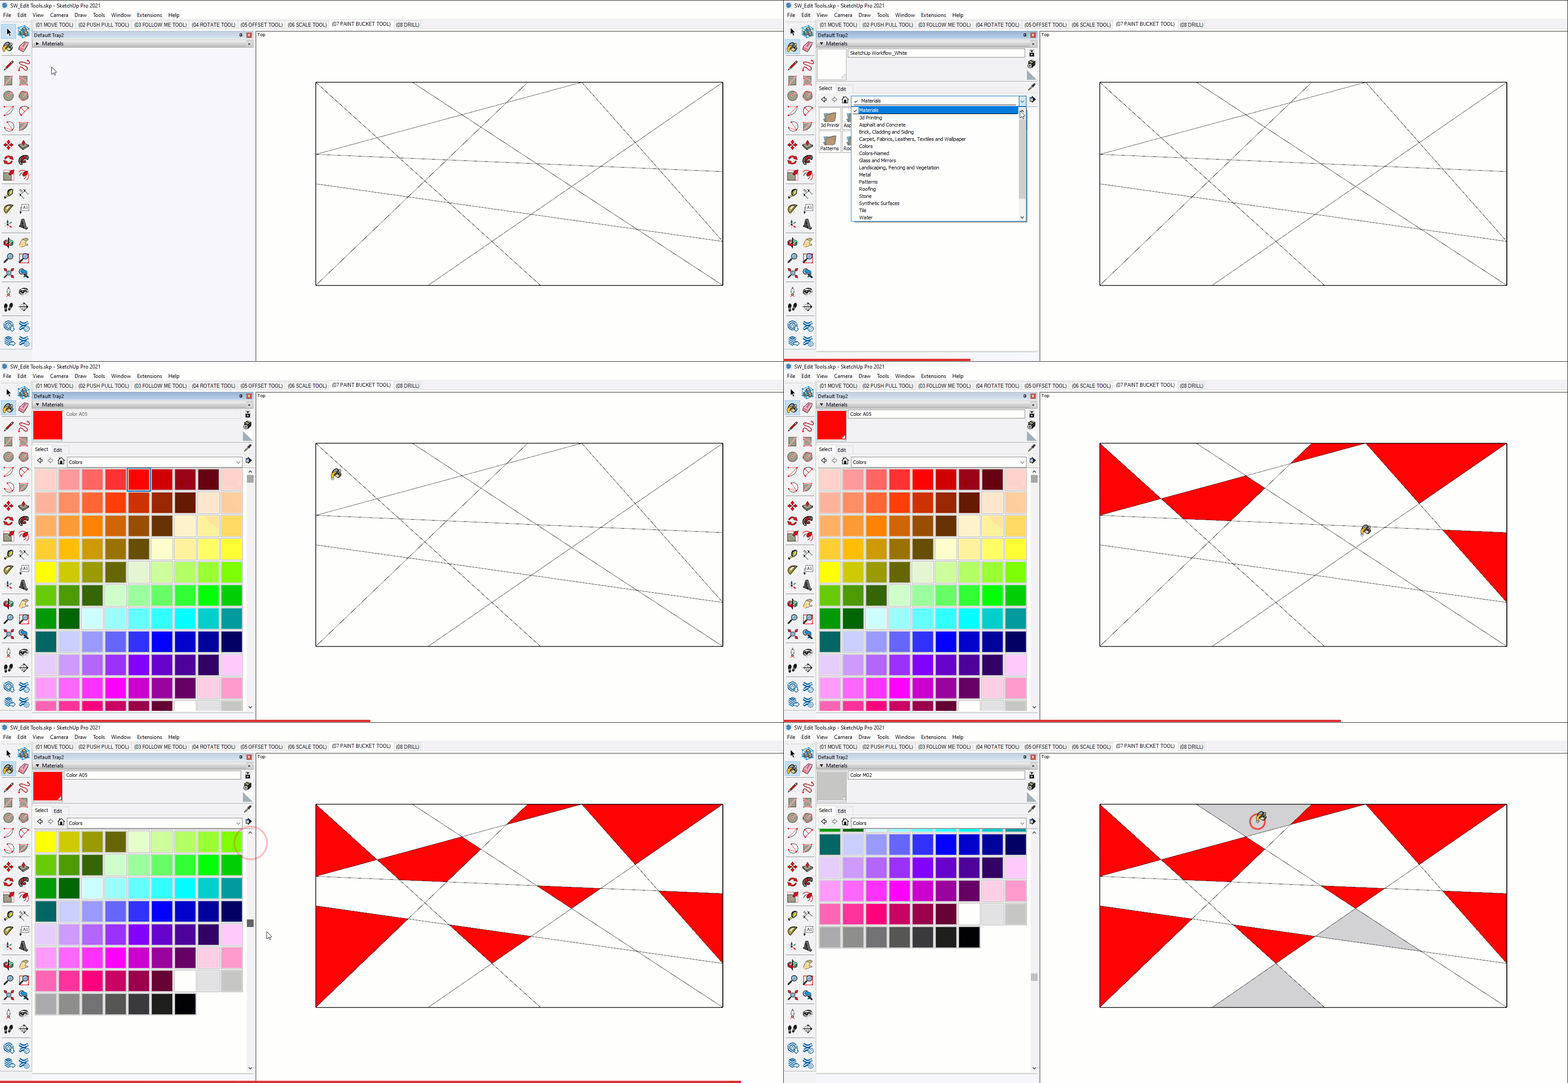
The Paint Bucket tool applies colors and textures to surfaces. The Materials browser is where you create, edit, and manage textures, or materials. Keep these tips in mind...
- On the Select tab, click on the dropdown to choose from pre-loaded collections.
- Click on a material to make it active, click on a surface to apply.
- Click the "In Model" house icon to see which materials have been used in your model.
- Click the Details button to manage material collections, purge unused materials, and change the view options.
- On the Edit tab, change the material name, color, texture image, and opacity.
- Use the pickers to sample colors from your screen, or from within your model.
- Click on the edit tab to modify the active material.
DIG DEEPER... Read more about materials on page 142 of "The SketchUp Workflow for Architecture".
